
How to Replace Coin Acceptor Part
Complete guide for replacing a defective coin acceptor
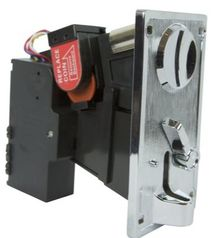
When to Replace Your Coin Acceptor
There may be instances when a customer puts in a coin it never is returned. This is called a coin jam. The other situation is when a customer inserts a coin it is rejected and appears in the lower coin slot.
If cleaning and troubleshooting the existing coin acceptor doesn't resolve persistent coin jams or rejection issues, it may be time to replace the entire coin acceptor unit.
Tools Needed
Required Tools:
- 3/8 socket to remove 4 bolts
- Needle nose pliers
Safety First: Always disconnect power before beginning any replacement work on the coin acceptor.
Remove Defective Coin Acceptor
Step 2.1: Remove mounting bolts
Unscrew all 4 nuts from bolts which are holding the coin acceptor into the coin box front metal door.
Step 2.2: Disconnect ground wire
Remove the green ground wire which attaches the main box to the front door.
Step 2.3: Disconnect wiring harness
Remove the wiring harness from the coin acceptor.
Install New Coin Acceptor
Step 3.1: Mount the new acceptor
Screw all 4 nuts from bolts which are holding the coin acceptor into the coin box front metal door.
Step 3.2: Connect wiring harness
Re-attach the wiring harness to the coin acceptor.
Step 3.3: Connect ground wire
Re-attach the green ground wire which connects the main box to the front door.
After Installation:
Once installation is complete, reconnect power and test the new coin acceptor with several different coins to ensure proper operation. Make sure to configure any dip switch settings as needed for your specific coin setup.
Need Replacement Parts?
Contact our support team for genuine replacement coin acceptor parts and technical assistance.
Call: 647-931-1829